This post will share how to give Xhorse Smart Key Box the ability to do keyless entry as well as keyless go, so that the cars unlocks and locks as soon as I walk away with it using just the signal from smartphone since there’s no proximity in this vehicle standard or stuck. Check how to install it as well as how to get it set up running for your vehicle. It should be very easy to do.
Car model:
2014 Nissan Versa
Devices required:
Xhorse VVDI Key Tool Max with Mini OBD Tool
Step 1: Program a new working remote by Key Tool Max with Mini OBD
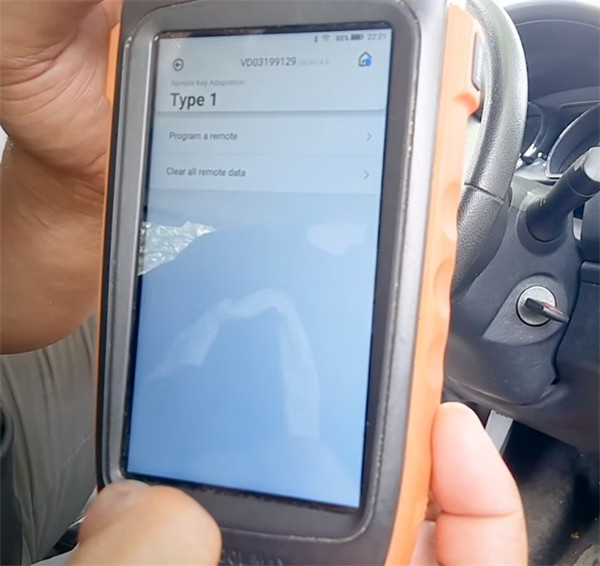
Go to IMMO Programming>> Nissan>> Select form system>> Remote Key Adaptation>> Type 1>> Start execution
Select “Program a remote”

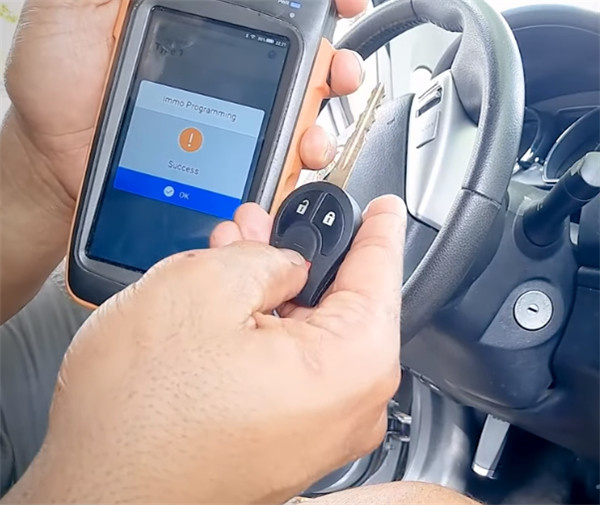
Press UNLOCK button of remote
Once you have a successfully generated remote, go ahead and teat all functions to make sure the key is properly working.
After that, move on to next step.
Step 2: Xhorse Smart Key Box Setup
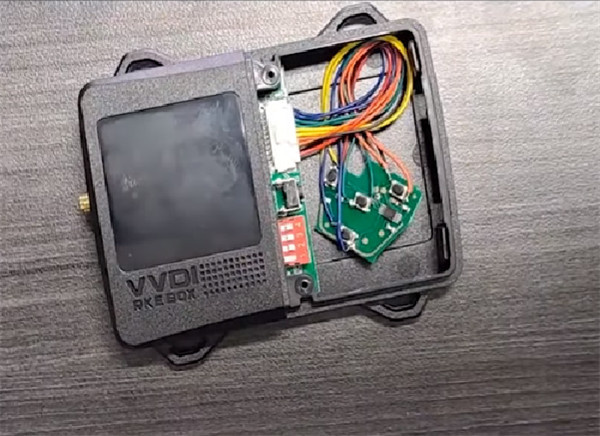
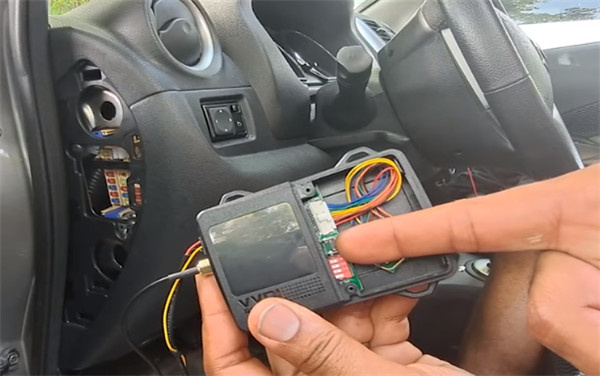
The XHORSE SMART KEY BOX package includes instructions, 10-wire connector, RF Antenna, LF Antennas (Long and short) and the Smart Key Box.
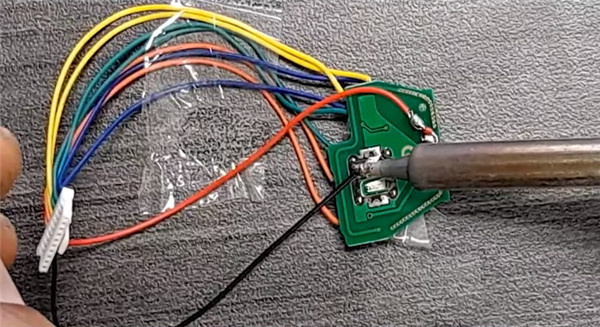
After removing the screws and opening up the Smart Key Box, go ahead and place it to the side. Disassemble the key, remove the PCB board and place it down.
Take note of the locations of each of the buttons and find the 10- wire rainbow connector and take note of which wires relate to which are soldered to the correct points.
- Red- 3V (+ Battery connector on PCB)
- Black- (- Battery connector on PCB)
- Orange- Lock
- Yellow- Unlock
- Green- Trunk
- Blue- Panic
Solder all connections, diagonally for 4- pin buttons, or opposing side for 2- pin buttons
Solder power Red wire directly to the positive connection on your board, and the Black wire directly to the negative connection.
After you’re done soldering, go ahead and insert the connector directly into the Smart Key Box board.
Note: Be careful! Don’t drop or shake the box, because it’s easy to mess up all connections that you’ve just soldered.
If your remote receives constant power, go ahead and switch dipswitch-1 to “On”.


Step 3: Install Xhorse Smart Key Box into the vehicle
1.Locate the OBD power cable and plug it into the OBD port
2.Locate RF Antenna and plan to install on or under driver dashoboard
3.Connect RF Antenna and OBD power to the rear of the Smart Key Box
4.Press and hold the learning button until the 3 second beep occurs to let you know the learning process has begun
Step 4: Run SmartKey APP
Open up the downloaded and installed Smart Key App
Press “Connect the car” button to begin
Turn on Bluetooth, and select your smart key box from the list, the name should start with KE0
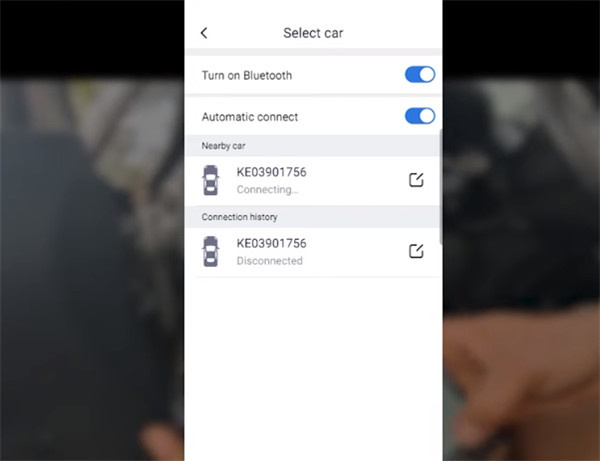
Then press any On-screen button to bind phone to the APP
After receiving the program successfully signal, you can either close out of learning or the smart key box can save and connect six remotes or phones at a time.

In addition to the original car remote count, end learning mode by holding the Button again until 3 second beep and LED is off
Step 5: Test the function
Test by leaving vehicle and approaching to check all settings are working
Hold the screen Lock button, and the car has locked
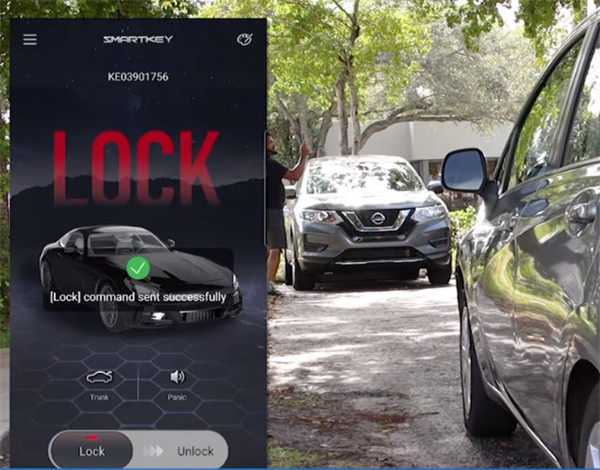
When the keyless entry kicks in, press Unlock button, and the car is unlocked.

Everything works just great! All of these settings can be adjusted as you go and nothing is technically set in place. You can always mess with it and see which works out best for you.
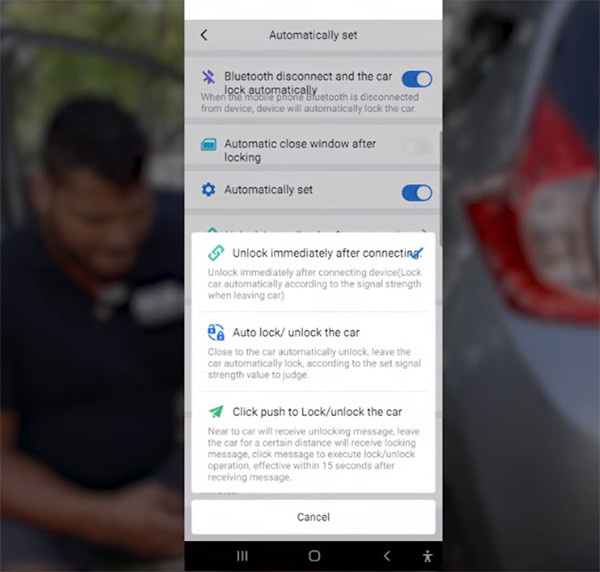
In the APP, go to settings, and select “Automatically set”
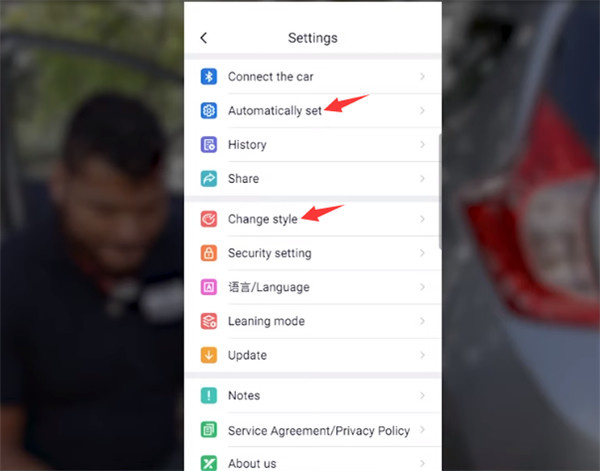
In this menu, Set Bluetooth to “Automatically set”, adjust new settings until sensitivity matches your desires.
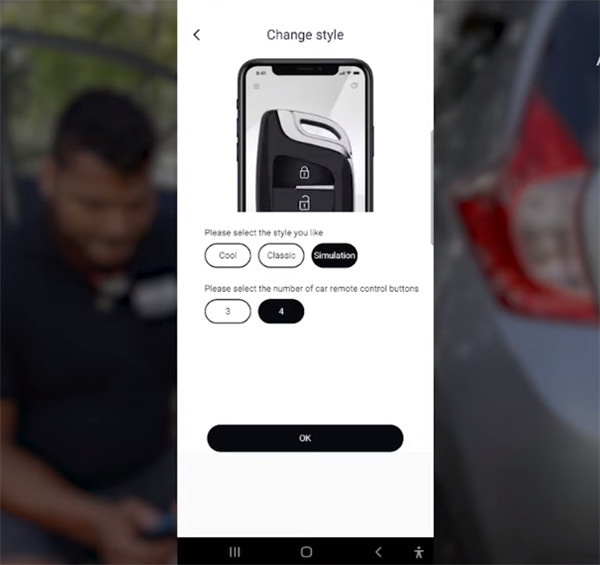
Go back and select “Change style” to pick a new look
Add or remove buttons, and change icons to match other possible functions.
Alright, the VVDI Smart Key Box is very easy and simple to use with the unique APP.
Xhorse Smart Key Box User Manual: Achieve a Non-remote Driving Experience with Smart Phone