How to use Xhorse Multi Prog to read and write EEPROM?
You need to check the EEPROM model, and use the corresponding adapter to work with it.
Operation Guide:
Step 1: Check EEPROM model
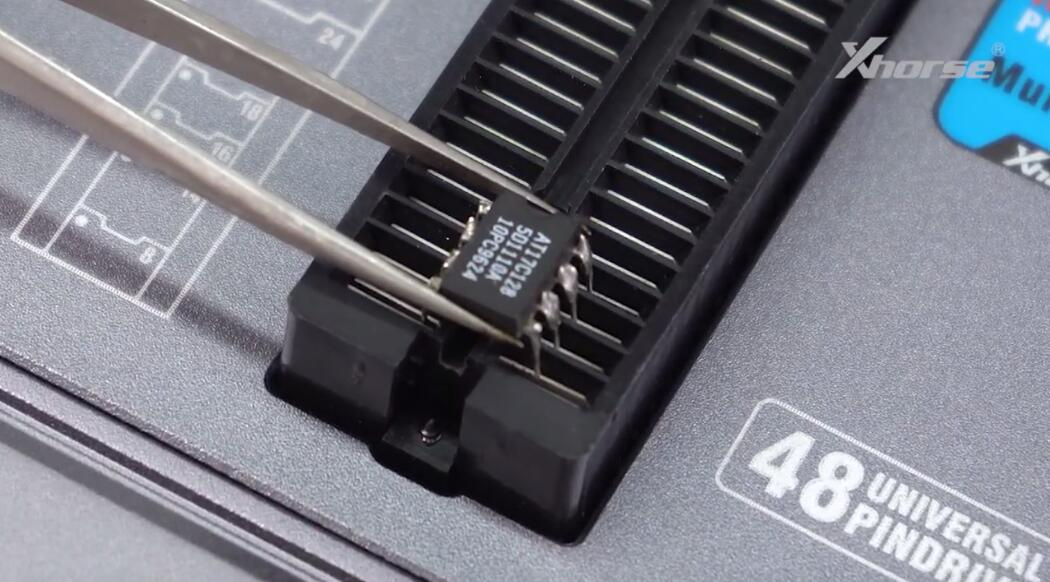
i.e. ATMEL AT17C128(DIP8)

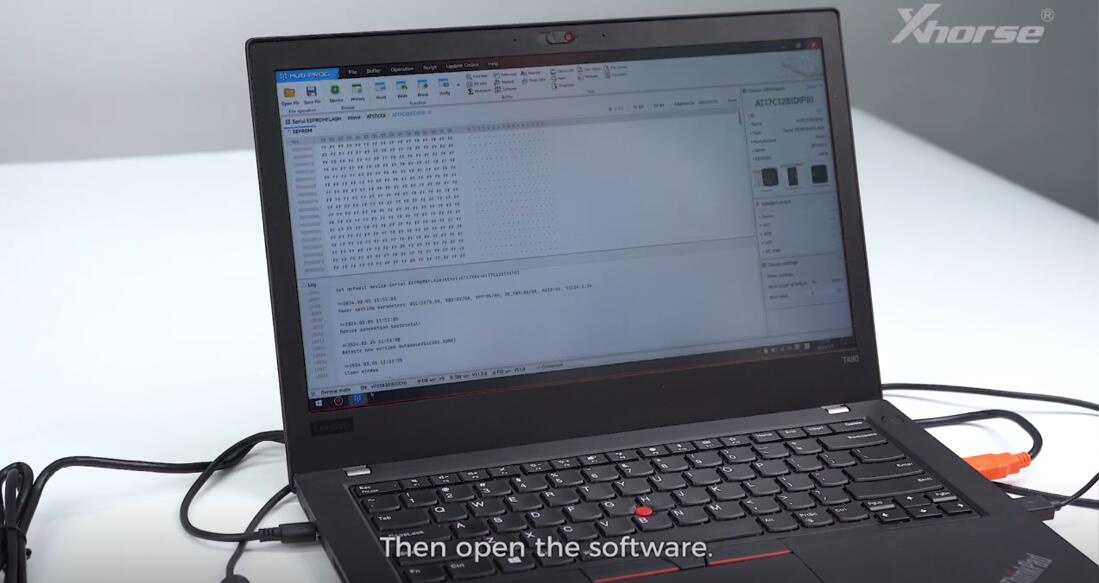
Step 2: Connect device and computer
Connect Multi-Prog Programmer and computer via USB cable
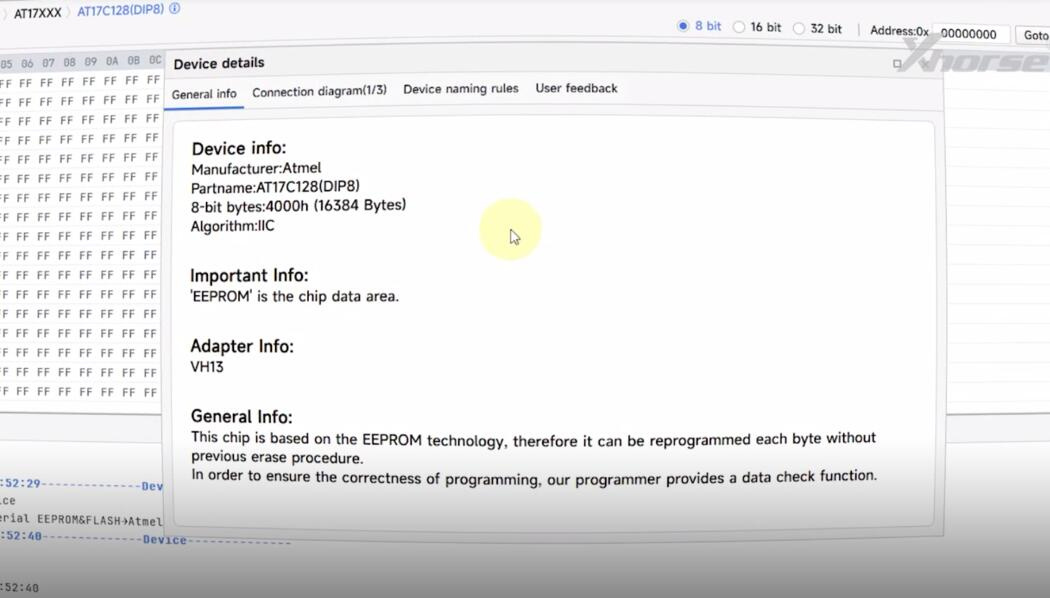
Step 3: Check device general info
Run Multi-prog software
Select Device>> Serial EEPROM&FLASH>> AT17>> AT17C128 (DIP8) (Atmel-> AT17xxx)>> Detail
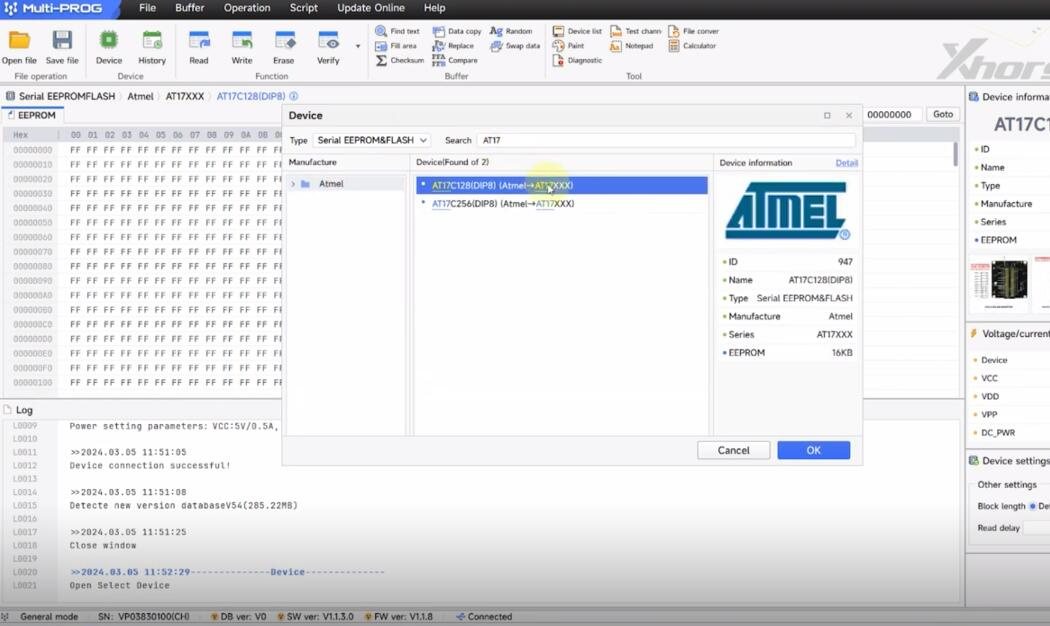
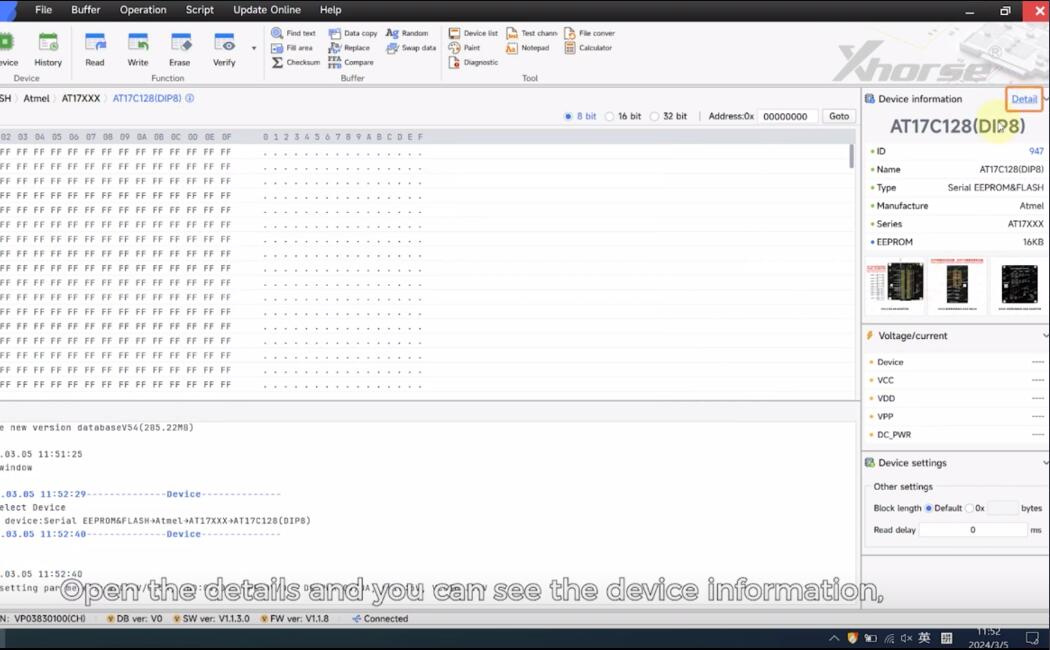
Check the device general info
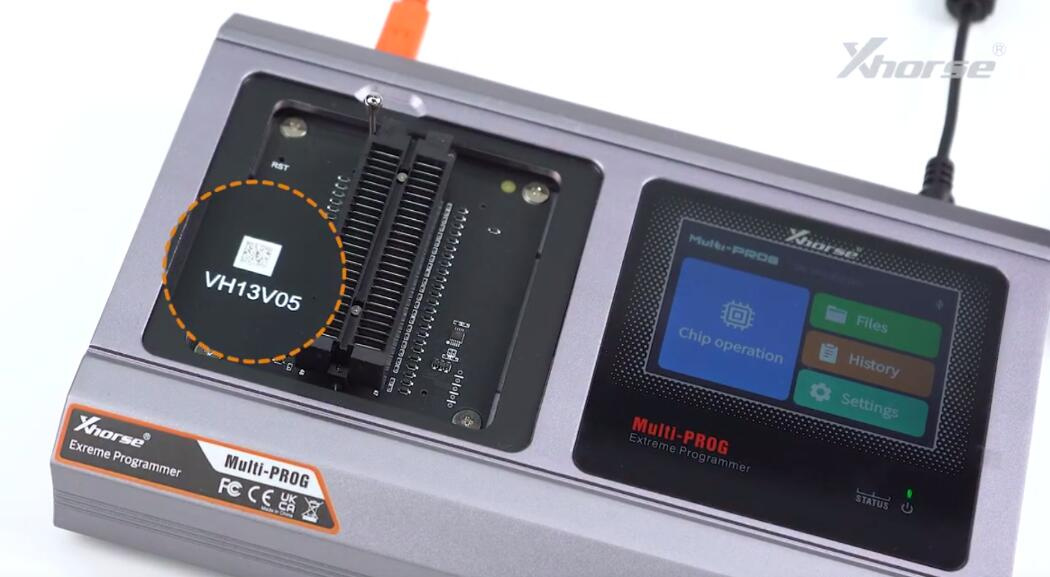
The Xhorse VH13 Adapter is required to read and write EEPROM.
Step 4: Install EEPROM to VH13 Adapter on Multi Prog
VH13 Interface Adapter Board is installed in the Multi-Prog device by default.
Remove the magnetic shield and check if the adapter model is VH13
If yes, put the shield back.
Place the EEPROM chip aligned at the bottom of VH13 Adapter
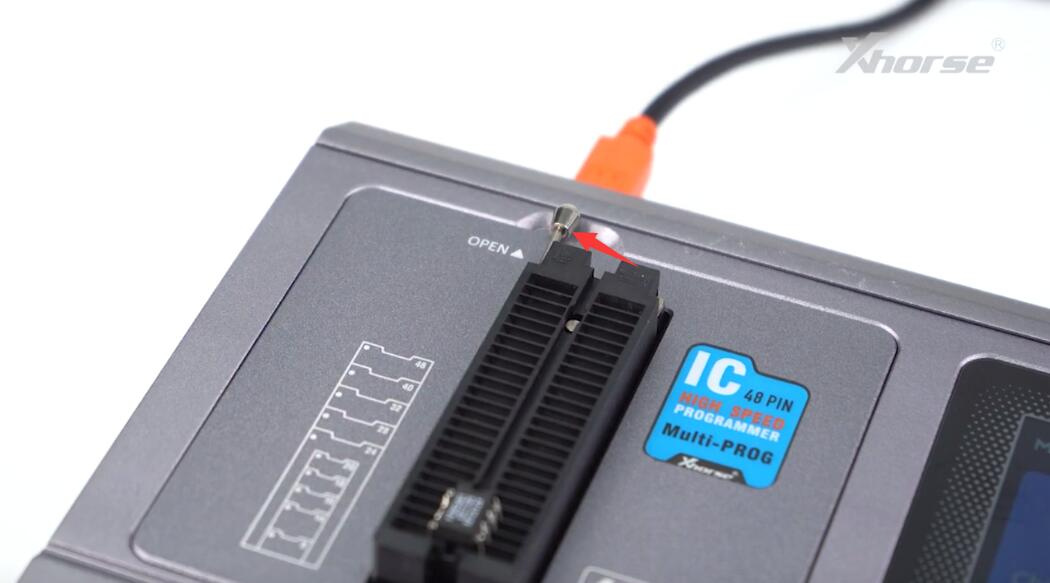
Ensure that the pin one is upward and then lock it
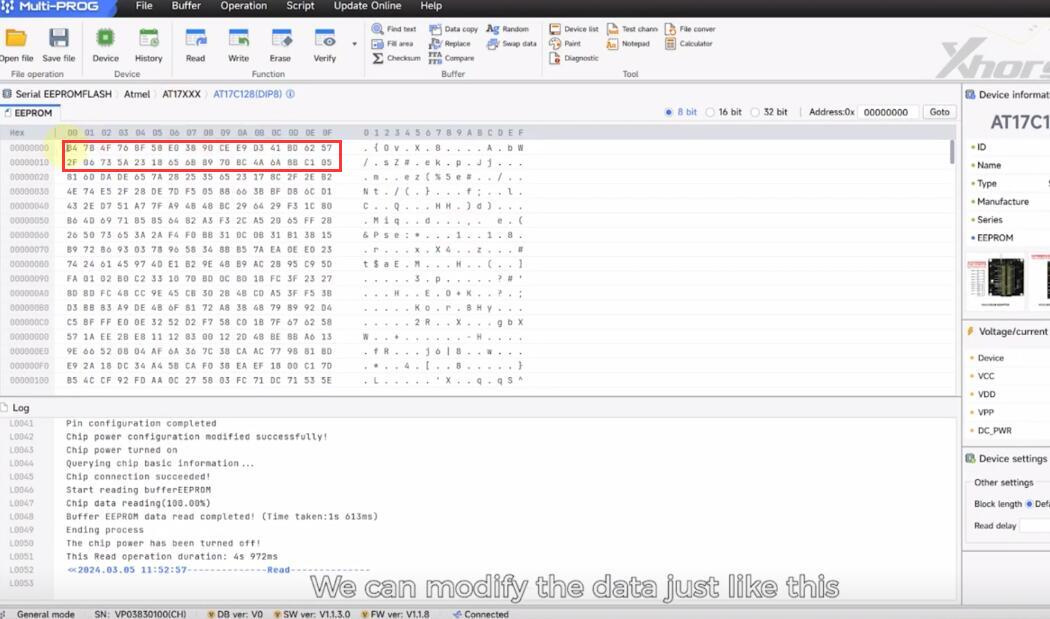
Step 5: Read EEPROM
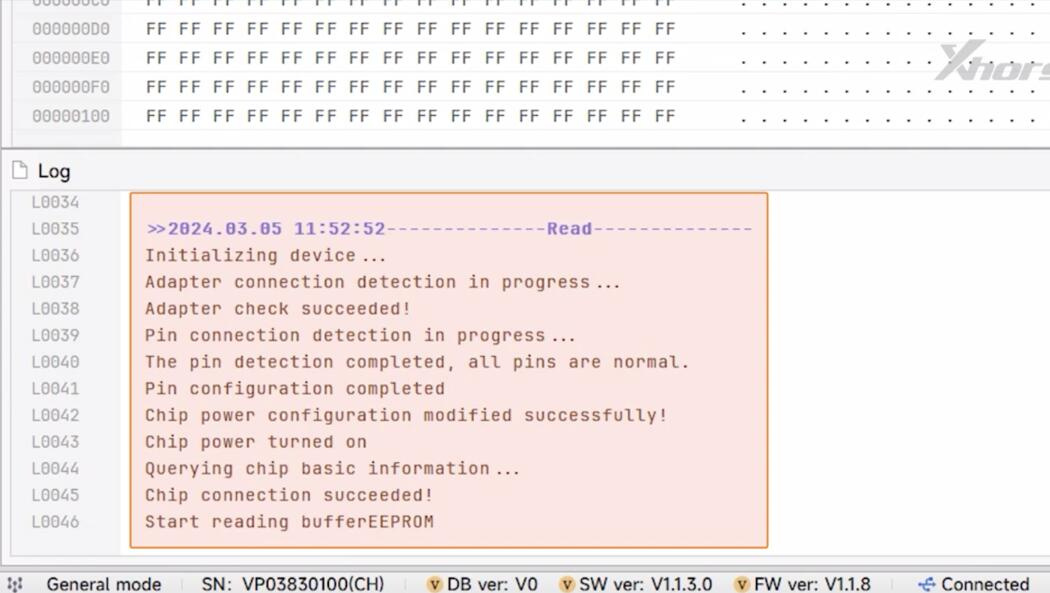
Click “Read” to read EEPROM data
Detect all pins are normal and chip connection is successful
Start reading buffer EEPROM
Read buffer EEPROM data successfully, whole reading process takes 4s 972ms.
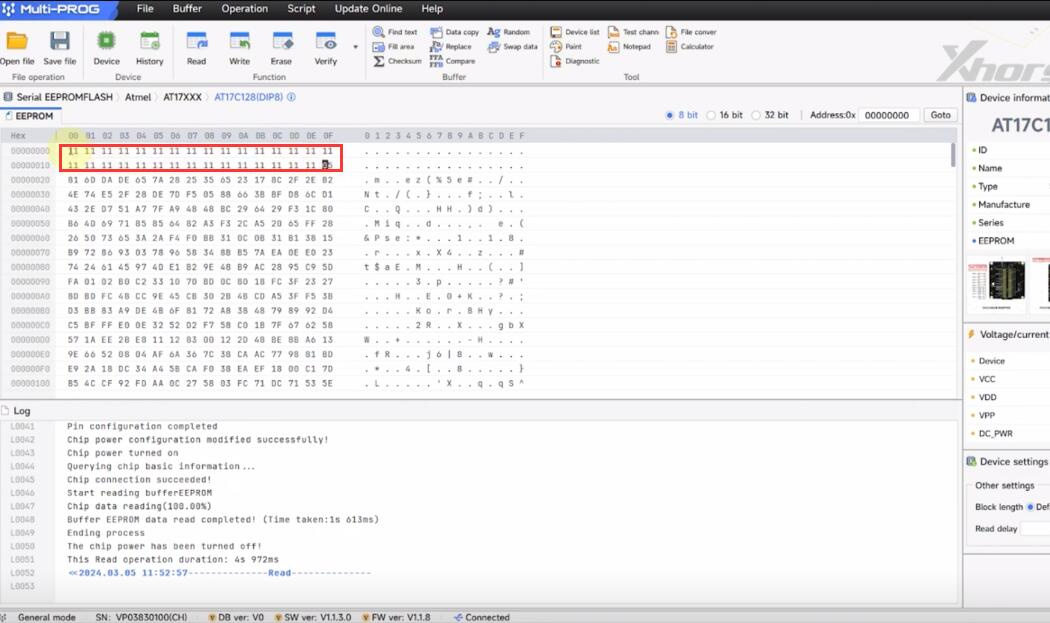
Step 6: Write EEPROM
We can modify the data, and just input the value you want quickly (i.e.11)
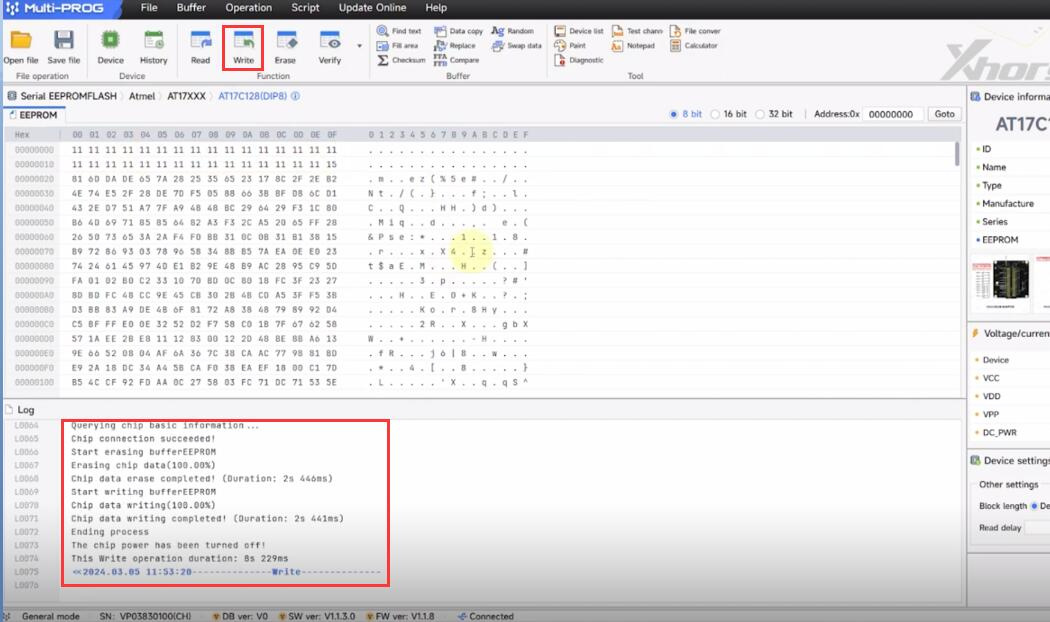
Click “Write”
It starts erasing the buffer EEPROM data, and writing the new data.
Write chip data successfully. It takes 8s 229ms
Read the data again, the EEPROM data has been modified successfully using Xhorse Multi-Prog Programmer with VH13 Adapter.

Besides VH13 Adapter, Multi Prog also has VH20, VH23, VH24 SOP44 & TSOP48 Adapter, VH29 EEPROM & FLASH Adapter, VH30 SOP44 Adapter, and VH31 TSOP48 Adapter. For different chips, select the corresponding Adapter.
For more details, please check below.